What We're Watching

Thursday, November 22, 2012

Rating: 8/10
 My husband and I watch a lot of movies and follow a lot of TV shows.  It's a hobby of his that I get caught up in.  There are definitely plenty of movies and shows that I skip out on and he doesn't, but I catch most of them.  I've always wanted to share some of this on my blog, but it was something that was always put on the back burner.  I will try not to give you any good spoilers, though there may be some minor ones.  Also, I don't have a sophisticated rating system, so take it how you like.

Now, this is a movie you either are or aren't watching.  For the most part, everyone who has watched this, this week has already seen the previous movies.  And most of those fans have also read all the books by Stephenie Meyer.  I read Twilight, the original book in high school (or maybe it was middle school?).  I never knew there were sequels until just before the first movie came out.  I have to say that I have only missed one premier, and my husband has attended all of them.  I'm more of a Vampire fan and he's more of a Werewolf fan (regardless of the movie or TV show), so we love this series.  It is more appropriate for the younger age groups.  Now that I watch shows like Trueblood and Vampire Diaries, it's sometimes hard for The Twilight Saga to measure up.  This was definitely the best one yet.  Of course, I was a little disappointed with a few scenes that were cut short or left out entirely (like when Bella discovers Jacob has imprinted on Renesme).  However, I give this movie an 8/10.

Rating: 9/10

Okay, this movie caught me off guard.  I totally loved it!  It was unexpectedly funny, and not stupid-funny like I expected it to be (I'm not really into spoof movies).  However, as I told myself (repeatedly) that I was going to go to sleep, I find myself standing in the living room sucked into this movie.  I think I probably spent 75% of the movie trying to convince myself to go to bed, until I finally sat down on the floor and finished it.  If you don't know, this story is about a high school nerd (played by Matt Bush) who gets stoned with a his childhood friend (played by Sean Marquette) and fears losing his scholarship when the schools mandates drug testing.  What's the solution?  Sabotage a PTA bake sale and get the entire school high.  Surprisingly funny, I give this movie a 9/10.

Rating: 8/10


Another movie in the Madagascar series, I can honestly say that I wasn't disappointed.  I watched this with my son on the couch one morning earlier this week.  We had just woke up and didn't feel like crawling out of our PJs yet.  It's a cute story where the classic Madagascar crew is being hunted for their heads and, to survive and blend in, join a circus.  It's a nice twist on a the run away with the circus cliche where the characters learn about friendship and helping one another.  It should be a movie an entire family can watch.  I give this movie an 8/10.

I did these "reviews" of my own accord.  I didn't receive anything free to do them.  I paid to rent the movies or go to the theater because I or someone in my household genuinely wanted to watch one of these movies.  I hope you my recommendations help you, or you enjoyed reading them, or something.

Holy Hotness Chili

Friday, October 19, 2012


For some reason, I didn't take any pictures of the chili?
For a brief period of time, my sister and now-brother-in-law lived with my husband and I.  Eli, my brother-in-law, likes to walk on the wild side eat on the spicy side.  Therefore, during their stay here, I challenged myself a time or two to make spicier dishes, including spicy (delicious) chicken tacos.  I only remember making chili once, maybe twice, while they lived here and it never was quite up to par with Eli's spicy requirements.

Fate would have it, the eve of their departure, I was tempted to make chili.  Ironically, jalapenos are extremely cheap at my local grocery store.  Unfortunately, everything else is outrageously high.  Tempted by the low price tag, I purchased four jalapenos.  Thus begins the story of the Holy Hotness Chili.

Estimated Prep & Cook Time: 45 minutes


Ingredients & Supplies

  • 1lb Hamburger
  • 15 oz Hormel Chili
  • 4 Jalapenos
  • Canned Mushrooms
  • 64oz Tomato Juice
  • Light and Dark Kidney Beans
  • Canned Diced Tomatoes
  • Skillet, spatula, soup ladle, pot

How To

  1. Brown hamburger in skillet.
  2. While browning hamburger, remove the stems from jalapenos and puree in blender.  Adding a little bit of tomato juice to the blender helped this process, for me.
  3. In pot, combine all ingredients.  This can be done before, during, and/or after browning hamburger.  The only purpose is to heat all the other ingredients.
I served mine with cornbread, as chili is about the only meal I make cornbread with.

Too Hot for You?

 Turns out, this chili was much different than I anticipated.  This was a learning experience.  I realized, while I loved the hot spiciness all the jalapenos added, I very much dislike the actual flavor of the jalapenos.  Solution?  Sour cream!  It was, actually, very delicious.  I added between 2 and 3 tablespoons of sour cream to my chili and it was the perfect dish!  This is great to know if your family has some that like it very hot and some that prefer a more mild dish.  Thanks to my google research,  I also learned that adding sugar, lemon juice, lime juice, dairy products, and several other ingredients can have the same effect.  Of course, taste will vary depending on which ingredient you decide to add.  For me, sour cream was the perfect choice!

This left lots of leftovers which I have been slowly consuming over the past few days, along with my sour cream.  It's just as good, if not better, the second (or third, or fourth) time around.

Peanut Butter Fudge

Thursday, October 18, 2012

 This was only my second time making peanut butter fudge.  Let me tell you, it was a much better experience than the first time I made it.  That might be due to the fact that, this time, I had an actual recipe.  Last time, my husband's grandmother gave me her verbal, vague version.  "Some peanut butter", I pretty sure was one of the things she told me.  Well, unfortunately for me, I wasn't able to figure out how much was "some" and my it ended up tasting more like straight peanut butter than fudge.  BUT now I can successfully make peanut butter fudge. 

I'm usually reluctant to try recipes I've had bad experiences with.  I tend to avoid them until I just have to make them.  In this case, I was dying for something sweet and quick.  I ended up making peanut butter fudge and no bake cookies. 
Estimated Prep & Cook Time:  15 minutes
Cool for an hour or so.

Ingredients & Supplies
  •  Pot
  • 3/4 cup peanut butter
  • 1/2 cup milk
  • 2 cups sugar
  • 1 tsp vanilla (optional/replaceable)
  • Baking pan or a plate to cool fudge
How To
  1. Combine sugar and milk in a pan and bring to a boil.
  2. Hold boil for 2.5 minutes.
  3. Remove from heat and stir in peanut butter.
  4. Pour mix into greased pan and wait for it to cool.
It turned out great!  I'm going to try and reduce the sugar by about a 1/2 cup the next time I make it because it was just a tad sweeter than I'd like it.  Also, I used about a 1/4 cup crunchy peanut butter and 1/2 cup creamy.  I'm very proud of the results and will continue to make fudge as a quick, sweet craving quencher!


Biscuit Pizza

Friday, October 12, 2012

Please excuse the poor quality.  Taken with my iPad.

Today I made what I have dubbed as the Biscuit Pizza.  I saw the recipe over at Mom Spotted, and knew I had to try it!  I wanted to try and combine her recipe and this Spooky Ghost Pizza I found.  However, I didn't have any fresh, sliced Mozzarella for the ghosts.  So, no spooky pizza for us.

I turned down dining out tonight because I was really looking forward to trying the recipe (don't worry, my hubby and I just rescheduled our dinner out for tomorrow evening).  I have tried, in the past, to make homemade pizza, and even homemade pizza rolls.  Neither were very good.  They took so much time and then there was little to no payoff.  Needless to say, my experience making homemade pizza-anything has been a disaster and not very encouraging for future endeavors.

I am so glad I decided to go for it and try this recipe!  My only regret was that I should have used the second can of pizza sauce I purchased.  I like my pizza extra saucy, but I honestly wasn't expecting the biscuit crust to be so successful.  I really hope that this pizza can help to save many more pizza-deficient cooks, like myself!

 Estimated Prep & Cook Time: ~1 hour

Ingredients & Supplies
  • Baking pan of choice
  • Skillet
  • 1 to 2 Cans Pizza Sauce
  • 1lb Hamburger
  • Refrigerated biscuits (not the flaky kind!)
  • 8oz shredded cheese, any kind
  • Pepperonis
  • Fresh Mushrooms
  • Other pizza toppings of choice


How To
  1. Preheat oven to 350 degrees
  2. Brown hamburger in skillet
  3. While hamburger is browning, open biscuits and place into baking pan
  4. When hamburger has finished browning, mix with pizza sauce
  5. You can mix in your pepperonis now or add them later.  It doesn't matter.
  6. Spread mixture over biscuits.
  7. Add cheese on top of that and pop into the oven.
  8. Cook in the oven for about 30 minutes.  I set my time for 28 minutes.  You don't want to pull early and have soggy, biscuit crust.  Leave in for this long to ensure your biscuits don't become soggy.
  9. Take out, cut, eat.  Enjoy!

Tater Tot Casserole

Wednesday, October 10, 2012

So, the other day I was feeling very unmotivated when it came to dinner. On most nights like this one, I quickly whip up spaghetti or macaroni and tuna or something just as quick and easy. My sister, however, brilliantly suggested we make Tater Tot Casserole. Simple, easy, classic, right? True on all counts. Except, would you believe that I had no idea how to make it. Yes, yes, I could've guessed and surely figured it out, right? Well, not only do I prefer to stay on the safe side, but it tends to bit me in the rear when I don't. I'm definitely no super chef. I grew up on pork steak and goolosh, so I didn't know much about anything else before I had a family of my own...or how great other food (and cooking it) could be!

Well, believe it or not, I only had about half the ingredients. I don't keep tater tots on hand and I don't like to keep sour cream around very long. After going through the trouble of looking up a recipe and realizing how delicious it sounded, I was having this dinner, regardless. So, I did what I hate to do... I drove to the grocery store in town and bought the tater tots and sour cream. Surely, they were a little overpriced, but still affordable enough where I didn't cringe too much at the register. I despise shopping more frequently than my weekly trip, where our weekly food budget is typically spent. However, I had to have Tater Tot Casserole. That was all there was to it. I'm happy to say that it turned out fantastic! Everyone loved it, including my picky self. It was delicious! The only thing I'll do different next time is I won't use Velveeta Shredded Cheddar Cheese. It's very sharp, very dry. It's hard to melt, as well. It's a very poor choice for melting on thing, like my baked spaghetti or on lasagna. On to the recipe! Which is probably the same as 100 others, but I had to look one up, so maybe you need to, as well?


Estimated Prep & Cook Time: ~1 hour


Ingredients & Supplies
  • Bag of Tater Tots, any brand will do
  • 8oz+ Shredded Cheese of choice
  • Cream of Mushroom
  • Sour Cream
  • 1-2lb Hamburger
  • Pan to fry hamburger
  • Baking dish
How-To
  1. Preheat oven to 350 degrees.
  2. Brown hamburger in skillet.
  3. Mix hamburger, sour cream, and cream of mushroom in bottom of baking dish.
  4. Top burger mix with tater tots.
  5. Top tater tots with shredded cheese.
  6. Pop into oven until cheese is melted & tater tots are done.
Tip: I sliced up some Velveeta block cheese (yum!) and put the slices between my burger mix and my tater tots for an extra cheesy, delicious casserole.


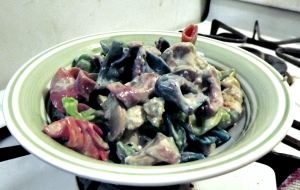
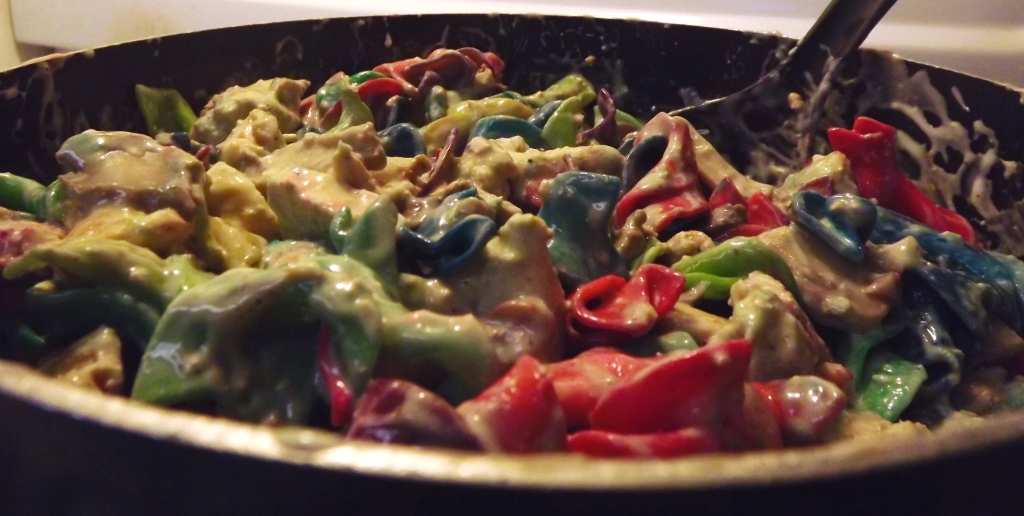
Rainbow Chicken Alfredo

Wednesday, October 3, 2012

Rainbow Chick AlfredoSo today I thought I'd try out a "recipe" that popped up on my Facebook newsfeed a few days ago (see here). That recipe looked like it'd be a ton of fun. That and I really wanted to listen to my husband moan (like he usually does) about the effect food coloring has on his and the little one's poop. Unfortunately for me, my husband decided not to complain this time around. However, I did get some pretty fun-looking chicken Alfredo for dinner.
Estimated Prep & Cook Time: ~1 hour
Ingredients:
  • 1lb. Egg or Fettuccine Noodles
  • Food Coloring
  • Plastic Bags
  • 3 to 6 Frozen Chicken Breasts
  • 1 Jar Alfredo Sauce
  • Mushrooms (Optional)
  • Seasonings of Choice
(Technically this could be done with any pasta, including spaghetti, macaroni and cheese, etc.)


 How to Make Rainbow Chicken Alfredo
  1. Put choice amount of chicken breasts into microwave on defrost setting. I use the bags of frozen chicken breasts from Wal Mart, but use whatever kind you like. We're not trying to thaw them entirely, because meat is easier to cut when it is still partially frozen. Therefore, it doesn't really matter how long you put them in there.
  2. Put water on the stove on high until it boils. Add pasta. Cook pasta to desired consistency. The original recipe says al dente which means squat to me. I even googled it, but whatever.
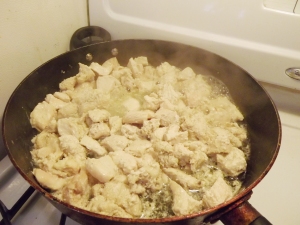
  3. Remove chicken breasts from the microwave when they have softened a bit. Cut however you like. I just slice/square them randomly. I'm not picky. Then add to pan and season to liking. I cook 'til browned a little on each side.
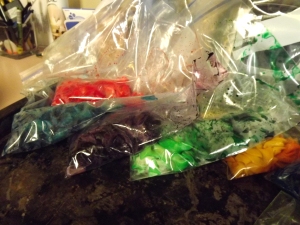
  4. While chicken and noodles are cooking, put about 20 to 25 drops of food coloring into each bag. I had my six and two year-old help me with this part. Also, I used 8 colors, so you may need more food coloring with less colors. Set bags aside until noodles are cooked to your liking.
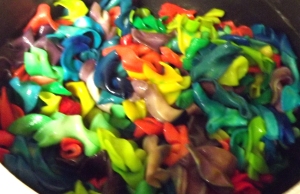
  5. When your noodles are done, put them in the strainer and run cold water over them to cool them down. Portion however you like into the plastic baggies. Zip them up and shake/mix well. My six year-old enjoyed this part most. If you let your little one help you, you may want to help them spread the coloring a little more than they do themselves.
  6. When finished, rinse each color individually in the strainer and add to the pot as you go. I heated my Alfredo sauce in the pan with the chicken once it was finished and also mixed in a can of mushroom pieces. Mix together and presto!

Plants VS Zombies Pinatas

Thursday, September 27, 2012

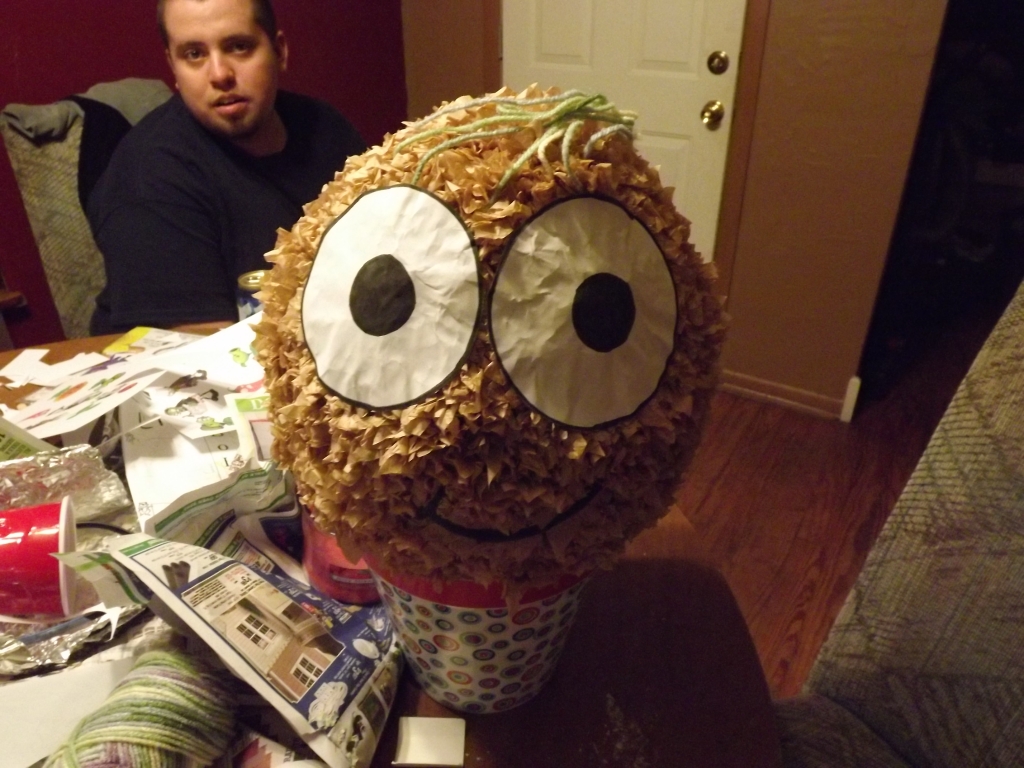
A pinata? Piece of cake! At least, that's what I thought. With Etsy giving me prices between $20 and $60, or more, I was determined to make my own pinata. How hard could it really be? I promise you, if you Google homemade pinatas and, later, paper mache, it'll sound like such a simple task. Flour, water, newspaper, and a balloon? I can do that. You can do that. Why isn't everybody making their own pinatas? Well, let me tell you, it's not as easy (or fun) as it sounds. Other than saving money, I convinced myself (and anyone who'd listen) that my six year-old would love it too. Wrong! First off, Talon was not happy about getting his hands covered in gooey paste. The uncomfortable look on his face and the pleading look in his eyes when he asked, "Can I go wash my hands now?" after three pieces of paper mache... Well, let's just say, I knew I was on my own. Thankfully, my sister was a lot of help. With pinata #1 (a Pea Shooter from Plants VS Zombies) nearly finished, we thought it'd be okay to pop the balloon inside before we added the final layer of paper mache. As I began paper macheing the second pinata (a Wall-nut), the Pea Shooter crumpled before me. It was a very sad moment, indeed. We did, eventually, get two relatively successful pinatas. It only took one crumpling and one exploding Pea Shooter to get a half-way decent one. The Wall-nut, thankfully, never crumpled or popped. He turned out to be my favorite, too. So, here's my recipe for making a homemade pinata...based on my own not-as-terrific-as-expected experience.  
Paper Mache & How to Make It 
Paper Mache can be bought for ridiculously more than it costs to make it. At my local art store, I originally bought (before later returning) two bags for roughly $8.00 each. At home, I made paper mache for the cost of a bag of flour. Paper Mache is not just the flour and water--you have to dip the strips of newspaper in it too.
Materials Needed
  • Water
  • Old Newspaper
  • Flour
If you have trouble rounding up enough newspaper, try asking your local stores, such as Dollar Tree. My local Dollar Tree puts all of their old newspapers in a bin to be picked up and recycled. It was mighty full when I was there buying other stuff and I asked if I could have some to make pinatas with.
Paper Mache Recipe
  1. Pour desired amount of flour into container.
  2. Mix cold water with flour to desired consistency. Electric mixer preferred, but not necessary. I prefer it to be really thick for the first layer and runny for the others. However, it's more of a personal preference.
  3. Shred newspaper. All other sources say that cutting it is not as effective? I have not personally tested the difference.
  4. Dip shredded newspaper into paste mix & apply coated paper to balloon (or whatever you're paper mache-ing).
Tip: You can add salt to your mix to prevent mold from growing. Mold is unlikely to grow, anyway, unless you make a large, single batch and let it sit for a long period of time. You could add some salt, just to be on the safe side, anyway.
I'm definitely not an expert in this area, but I am proud of what I did accomplish! I mean, look how cute the Wall-nut is! If you're trying to make a pinata, you might want to use google to find better resources (like Martha Stewart).
Powered by Blogger.
Blog contents © Mom's Potty Mouth 2010. Blogger Theme by Nymphont.