Showing posts with label crafts. Show all posts

Cereal & Other Box Upcycling: Organizing Children's Books

Monday, April 15, 2013


I think this the project that started it all for me, when it comes to upcycling boxes.  Believe it or not, it was not something I discovered via Pintrest.  Instead, another preschool teacher, whose break I cover daily, uses this method in her classroom (to some extent).  For this project, I used cereal boxes, a packing box (similar to diaper box size), and other miscellaneous boxes.

My children have quite a few books and, honestly, I didn't realize no many until I was organizing them and stuffing the last one in.  Before they were all strewn across this shelf above their toy box, but now they're in this nifty little combination of boxes.

I've yet to decide on a permanent place for their book box, but I might just leave it downstairs. This is where it has been been since I finished it.  This project basically requires you have two items: boxes and a pair of scissors.  Just like in my organizing tupperware post, I took off one set of flaps, cut at an angle, and then straight across.  For the larger box, I cut off all flaps and cut a sort of smoothed V shape in the front.  Then, there you have it.

As always, feel free to decorate however you like or not at all.

How are your children's books organized?  Do you like this method? Why or why not?

Cereal & Other Box Upcycling: Organizing Tupperware Lids

Sunday, April 14, 2013


Yet another brilliant Pintrest discovery while filling up my DIY House Cleaning & Organization Pinboard. Pintrest has enlightened me and inspired me to reuse what would otherwise be considered trash.  One of my favorite and most popular upcycled items are cereal boxes and other miscellaneous boxes.  This is part one of a multi-part miniseries of posts dedicated to upcycling boxes.  Look for Organizing Children's Books, Organizing Mail & Paperwork, and Organizing Canned Goods in the near future.

Anyway, I'll show you what my tupperware lids looked like before I organized them with the boxes.  You might notice that these are, also, mostly upcycled butter, sour cream, and other containers.  More on that in a future post, as well.  As you can see, it was very messy

In order to create these nifty lid holders for my tupperware, I simply saved empty macaroni, cereal, and fruit snack boxes.  I then removed the flaps with scissors wherever the box was open.  Finally I cut at an angle most of the way down and then straight across.  I did the same on the other side.  I like this way best, but I'm sure you can modify the whole process to your liking.

As you can see, mine have yet to be prettified. I suggest colorful duct tape, fabric, wrapping paper, or scrapbook paper.  Or you could not do anything at all with them (for now or for forever) and let them simply be functional creations sans pretty.  Now, instead of needing an entire shelf for themselves, my lids are on the same shelf as my tupperware.

Have you done this or something similar?  Please share your own organization tips, creations, or recreations of this post!  Thanks for reading.

Valentines Worth Giving

Thursday, January 24, 2013

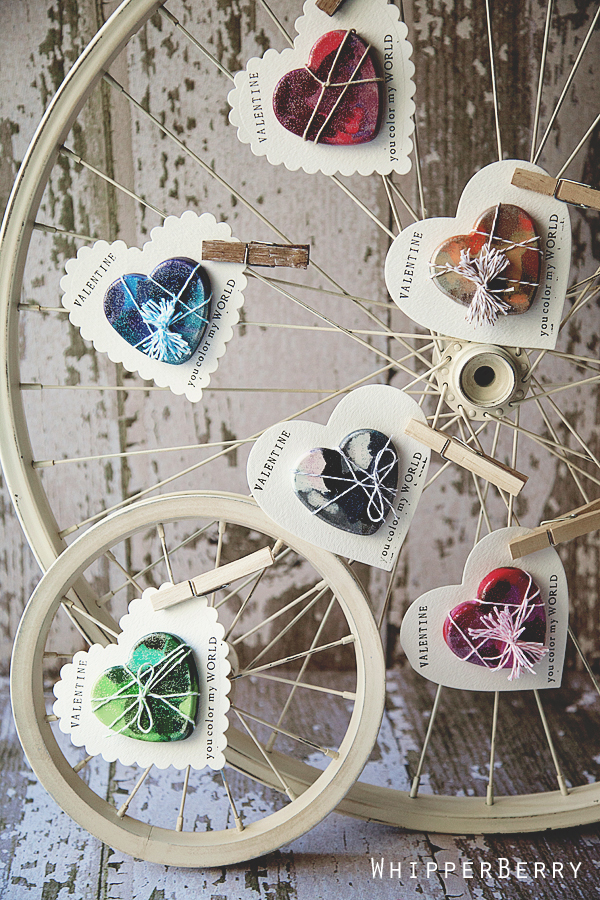
Crayola Heart Valentines @ Whipperberry
Valentine Ombre Specimen @ Lolly Jane
Valentine Pretzels & More @ Pint Sized Baker
Love Bugs @ If I Had a Million Hours
Cream Cheese Mint Conversation Hearts @ Twigg Studios
Rice Krispie Love Letter Mailboxes @ Hoopla Palooza
My "gifts" to you, considering I'm seriously lacking time to make anything super awesome myself.

Plants VS Zombies Pinatas

Thursday, September 27, 2012

A pinata? Piece of cake! At least, that's what I thought. With Etsy giving me prices between $20 and $60, or more, I was determined to make my own pinata. How hard could it really be? I promise you, if you Google homemade pinatas and, later, paper mache, it'll sound like such a simple task. Flour, water, newspaper, and a balloon? I can do that. You can do that. Why isn't everybody making their own pinatas? Well, let me tell you, it's not as easy (or fun) as it sounds. Other than saving money, I convinced myself (and anyone who'd listen) that my six year-old would love it too. Wrong! First off, Talon was not happy about getting his hands covered in gooey paste. The uncomfortable look on his face and the pleading look in his eyes when he asked, "Can I go wash my hands now?" after three pieces of paper mache... Well, let's just say, I knew I was on my own. Thankfully, my sister was a lot of help. With pinata #1 (a Pea Shooter from Plants VS Zombies) nearly finished, we thought it'd be okay to pop the balloon inside before we added the final layer of paper mache. As I began paper macheing the second pinata (a Wall-nut), the Pea Shooter crumpled before me. It was a very sad moment, indeed. We did, eventually, get two relatively successful pinatas. It only took one crumpling and one exploding Pea Shooter to get a half-way decent one. The Wall-nut, thankfully, never crumpled or popped. He turned out to be my favorite, too. So, here's my recipe for making a homemade pinata...based on my own not-as-terrific-as-expected experience.  
Paper Mache & How to Make It 
Paper Mache can be bought for ridiculously more than it costs to make it. At my local art store, I originally bought (before later returning) two bags for roughly $8.00 each. At home, I made paper mache for the cost of a bag of flour. Paper Mache is not just the flour and water--you have to dip the strips of newspaper in it too.
Materials Needed
  • Water
  • Old Newspaper
  • Flour
If you have trouble rounding up enough newspaper, try asking your local stores, such as Dollar Tree. My local Dollar Tree puts all of their old newspapers in a bin to be picked up and recycled. It was mighty full when I was there buying other stuff and I asked if I could have some to make pinatas with.
Paper Mache Recipe
  1. Pour desired amount of flour into container.
  2. Mix cold water with flour to desired consistency. Electric mixer preferred, but not necessary. I prefer it to be really thick for the first layer and runny for the others. However, it's more of a personal preference.
  3. Shred newspaper. All other sources say that cutting it is not as effective? I have not personally tested the difference.
  4. Dip shredded newspaper into paste mix & apply coated paper to balloon (or whatever you're paper mache-ing).
Tip: You can add salt to your mix to prevent mold from growing. Mold is unlikely to grow, anyway, unless you make a large, single batch and let it sit for a long period of time. You could add some salt, just to be on the safe side, anyway.
I'm definitely not an expert in this area, but I am proud of what I did accomplish! I mean, look how cute the Wall-nut is! If you're trying to make a pinata, you might want to use google to find better resources (like Martha Stewart).
Powered by Blogger.
Blog contents © Mom's Potty Mouth 2010. Blogger Theme by Nymphont.